
Electric shoe dryer for work shoes: drying time and use
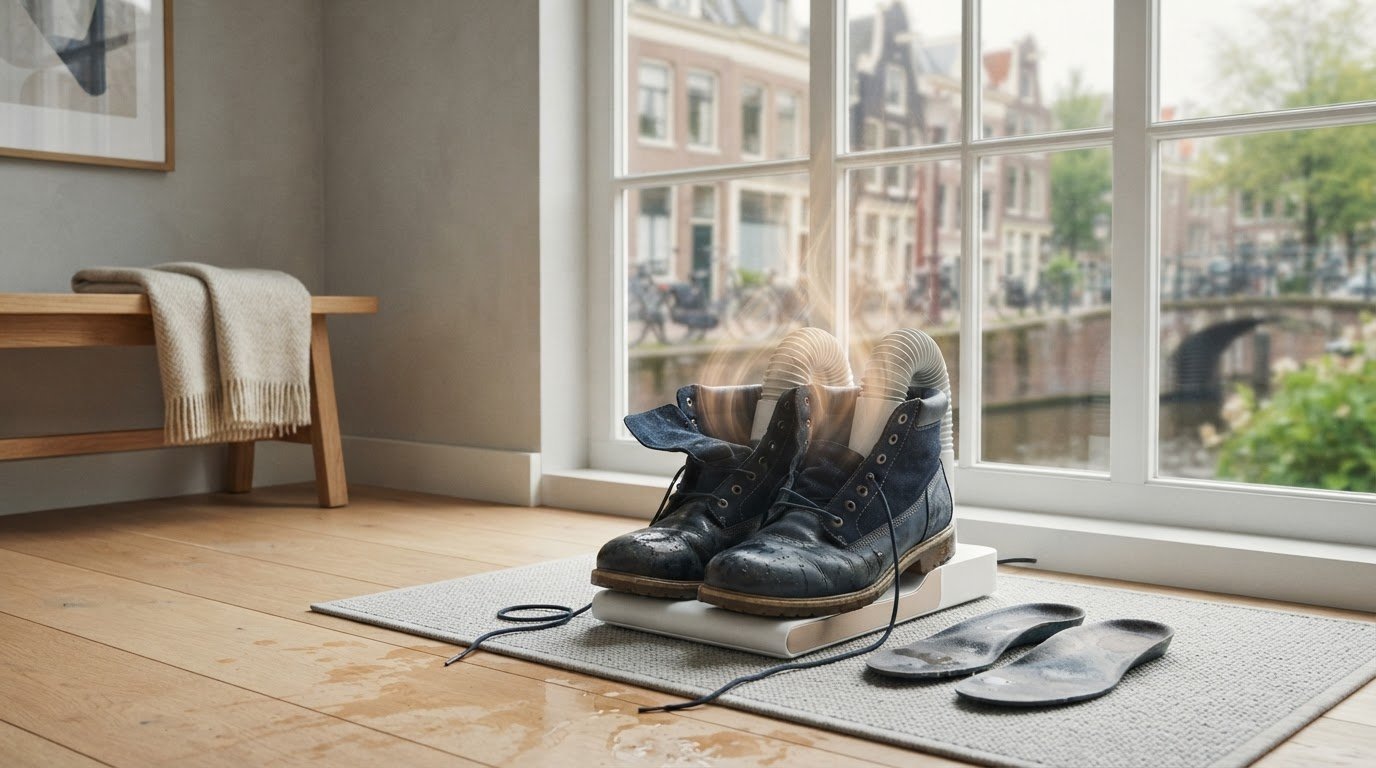
Soaked work shoes do not dry in a few minutes. An electric work shoe dryer can usually dry slightly damp shoes in 1 to 3 hours; soaked work shoes may take 4 to 8 hours. Drying helps against moisture, but an existing sweat odor does not always disappear on its own.
After a long workday, shoes are sometimes damp and less fresh. An electric work shoe dryer can help remove moisture, but the result depends on how wet the shoes are and the material. Dry them carefully, especially if they are made of leather: too much heat can damage the material.
In this article, you will read how drying time varies by shoe type, what to look out for with wet work shoes, and how to dry them carefully. You will also discover what a shoe dryer does and does not do regarding sweat odor, why the correct temperature is important, and when extra drying time may be necessary. This way, you choose an approach that suits your shoes and prevent unnecessary strain on the material.
Key points
- Adjust the drying time according to how wet the shoes are and the material; thick or soaked shoes may require an extra drying cycle.
- A temperature of approximately 40 to 55 °C is usually sufficient to dry shoes.
- Prepare shoes for drying by loosening them and letting removable insoles dry separately.
- Use a timer switch of 1 to 4 hours to prevent the dryer from running unnecessarily long.
- A shoe dryer helps reduce moisture, but it is no guarantee that sweat odor will disappear completely.
Drying time for slightly damp and soaked shoes
The drying time depends mainly on the amount of moisture and the thickness of the material. In light dampness, drying can take minutes to several hours. Soaked work shoes require considerably more time.
Drying time in light humidity
Slightly damp shoes are often dry within 1 to 3 hours. For sneakers, this can usually be done within an hour; normally damp sports or walking shoes dry on average in about an hour. A shoe dryer can dry shoes in approximately 30 to 60 minutes, depending on the initial situation. This shorter time is particularly suitable for shoes with little moisture. Afterwards, feel the insole and the toe area, where moisture can linger longer.
Therefore, do not just look at the clock. A thin sneaker dries differently than a lined work shoe. Remove a loose insole before drying and loosen the laces. This allows air to reach the damp areas better.
Drying time for soaked shoes
Soaked hiking boots or work boots may take 4 to 8 hours to dry. Additionally, soaking wet shoes and thick leather models may require two drying cycles. Start with a full cycle and then check several spots: at the heel, under the insole, and around the toe. If any spot still feels damp, extend the drying time according to the instructions.
First, let excess water drain from the shoes and pat the outside dry with a cloth. Then, place the dryer on a stable surface with the air vents unobstructed. A long drying time is no reason to turn up the heat.
Drying programs and temperatures
For shoes, approximately 40 to 55 °C is usually sufficient. When choosing a program, consider the shoe material and the amount of moisture. A short cycle is suitable for slightly damp shoes; soaked work shoes require more drying time. Models with programs may differ in settings, so follow the instructions of the dryer and the shoe manufacturer.
Choose a controlled temperature for shoes with leather, glued joints, or synthetic parts. After the first cycle, check if the inside dries without the material feeling hot. It is better to repeat a cycle than to increase the temperature in a way that the instructions do not allow.
Warm air and drying settings
A warm air dryer directs heat into the shoe; in models with a fan, air flows through the shoe. Operation varies by device. Keep the air outlets clear of walls and objects. For high work boots, also check that the shaft does not block the airflow.
If your device has a low and a high setting, choose the low setting for delicate material and start with leather. Use the high setting only if the instruction manual indicates it is suitable for your shoe type. After a cycle, feel the inside and check how much moisture remains. Adjust the next cycle to the shoe, not just the set time.
Suitability for work shoes and other closed shoes
An electric shoe dryer for work shoes can help remove moisture from closed shoes. The height of the shaft, the fit, and the material determine how well air reaches the inside. Think of low safety shoes, high leather boots, and lined winter shoes. Before use, check that the dryer is compatible with the shoe type and the material instructions.
With low work shoes, the vents are usually easily accessible. Loosen the laces and pull the tongue forward so that air can flow towards the forefoot. High boots have different requirements: the air supply must reach far enough into the shaft. Extendable air tubes of approximately 20 to 40 cm are useful for high boots or ski boots. Measure the shaft and compare it to the length of the tubes.
An electric shoe dryer for work shoes must also match the construction of your shoes. A steel or composite safety toe takes up space at the forefoot and can restrict airflow there. Therefore, after drying, also feel at the toe and under the insole. If you can remove the insole, set it aside so that moisture underneath can evaporate more easily.
- Low safety shoes: loosen the laces and leave the opening clear.
- High work boots: direct the air supply into the shaft without forcing it.
- Lined footwear: remove loose linings or insoles if possible.
- Leather shoes: follow the material instructions and choose a suitable drying method.
Hiking boots after a wet trail, athletic shoes after a workout, and rubber boots after outdoor work are also closed shoes in which moisture can trap. An open sandal benefits less from airflow, as air can already circulate around the foot. Use the dryer primarily for shoes that retain moisture in the lining, toe, or insole.
Before switching on, check that the shoes are standing stably and the air vents are clear. A rolled-up lining, tucked-in sock, or narrow shaft can obstruct the airflow. Position both shoes according to the device's instructions so that the air supply does not go to one shoe while the other is closed.
For waterproof membranes, lined leather, and glued parts, follow the shoe manufacturer's instructions. Do not use a drying setting that conflicts with this. Choose an electric work shoe dryer that matches the shaft height, placement, and material. This is how you determine if the dryer is suitable for your everyday work shoes, boots, or other closed shoes.
Drying shoes without damaging them
Assess the material and construction of the shoes before drying to prevent damage. Read the care advice for leather, textiles, synthetics, and glued parts. Remove visible dirt with a soft cloth and gently pat damp areas dry. Do not use a hard brush on delicate leather. When using an electric work shoe dryer, also pay attention to the placement: parts must not block the air outlet.
Follow the dryer's user manual and the shoe manufacturer's instructions. Do not select a heat setting that conflicts with the material recommendation. Pay attention to seams, glue joints, and synthetic reinforcements, as these may react differently than the outer layer. If you are unsure about a setting, choose one that falls within the instructions. Do not simply increase the heat to dry faster.
Prepare shoes carefully:
- Remove mud with a soft cloth before you begin.
- Remove removable insoles and dry them separately.
- Loosen the laces so that the tongue can move freely.
- Place the shoes down stably according to the manual.
- Check the material and the inside afterwards.
Also check the surface of leather work shoes while drying. If the leather feels hot or becomes noticeably stiff, switch off the dryer and let the shoes cool down. Do not place them against a hot radiator or heater. Direct heat can affect the material locally, whereas a shoe dryer directs air to the inside as instructed.
Even with shoes with a waterproof membrane, a gentle approach is advisable. Keep the air vents clear and prevent the inner lining from blocking the air supply. Do not pull a stuck lining loose. An electric work shoe dryer must not apply force to the upper or lining. Position the shoe so that air can circulate freely.
After drying, check not only the outside, but also the heel, the area under the insole, and the inside of the toe. If a spot is still damp, follow the instructions before starting another drying cycle. Allow the shoes to cool down before wearing or storing them. This way, you will notice any residual heat or remaining moisture.
With an electric shoe dryer for work shoes, careful use revolves around material, placement, and settings. Shoes with glued parts, for example, require attention to the temperature indications; a lined boot needs air at the inner lining. Follow the shoe manufacturer's instructions and specifically check afterwards whether your shoes are dry.
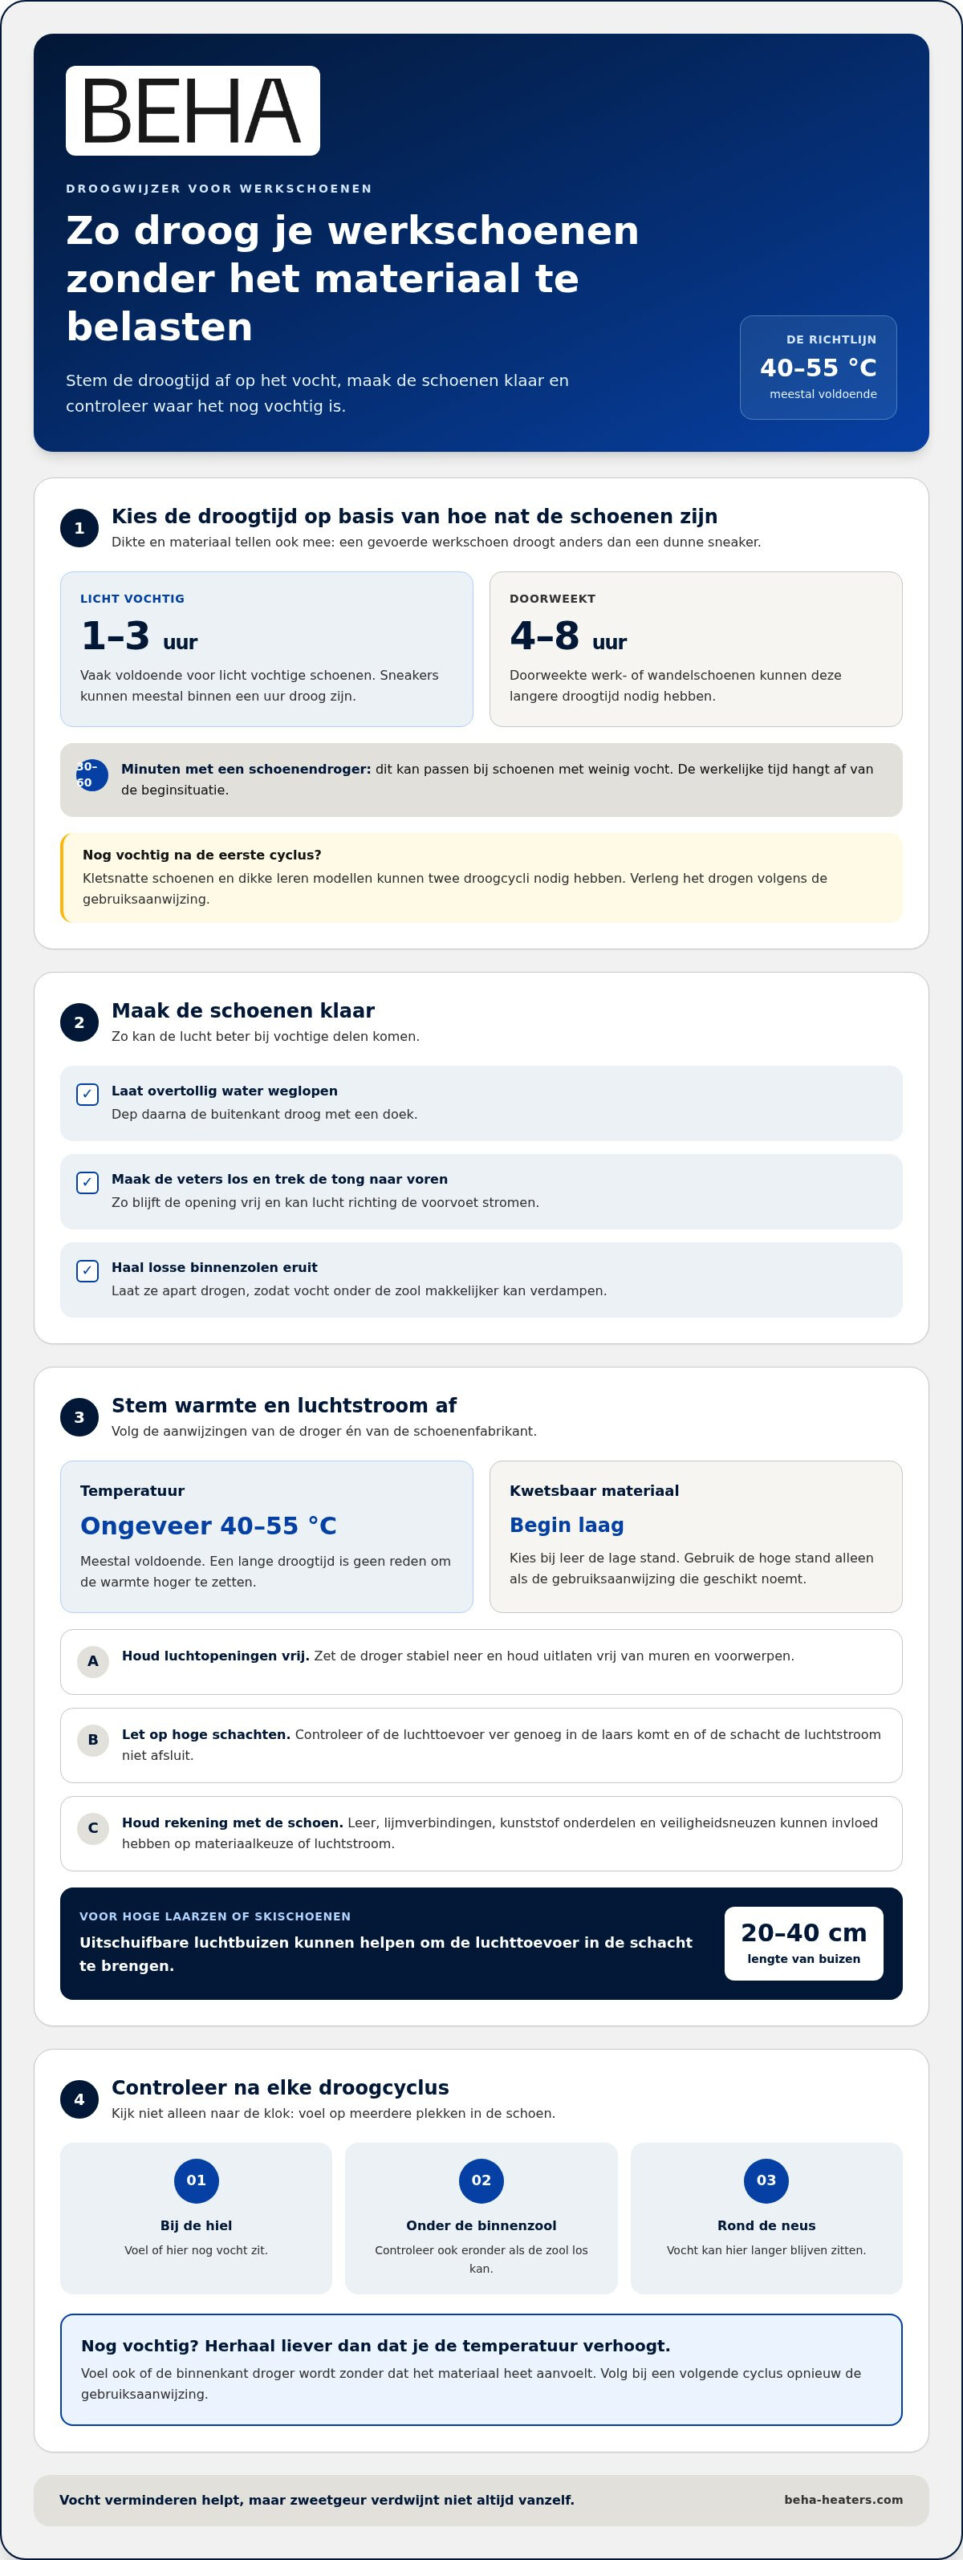
Electric shoe dryers for wet work shoes
For wet work shoes, the fit of the dryer, the range of the air supply, and the controls are particularly important. Compare these points with your shoes before choosing a model.
Electric drying of wet work shoes
An electric shoe dryer for work shoes directs warm air or heat to the inside. First, check if the air supply matches the height of your work shoes. For high boots, extendable air tubes of approximately 20 to 40 cm can be useful. Place the shoes according to the instructions, without closing the air vents.
The construction partly determines how wet work shoes dry. A lined boot retains moisture differently than a low work shoe with a smooth interior. Remove removable insoles and set them aside if the shoe instructions allow this. This allows air to reach the space under the sole as well. After drying, check not only the shaft, but also the toe and heel.
When making your choice, also consider the air supply. A compact model can fit inside the shoe, while a device with tubes directs air into the shaft. Check that your work shoe stands firmly on the dryer and that both shoes can be placed at the same time. A proper setup helps prevent one shoe from receiving less air.
An electric shoe dryer for work shoes is particularly practical if wet shoes occur regularly, for example due to outdoor work, a humid environment, or rainy days. According to market data, air drying takes one to two days. The drying time with a device depends on the amount of moisture, the construction of the shoe, and the free airflow.
Safety during nighttime drying
If you want to dry wet work shoes for the next workday, use the timer according to the manual. A timer of 1 to 4 hours prevents the dryer from running unnecessarily long. This is useful for a shoe that requires more time, but it eliminates the need to let the dryer run unchecked all night.
Check the cable, plug, and housing before switching on. Place the device on a stable, dry spot and keep the air intake clear. Use an electric work shoe dryer according to the device's instructions. Switch it off if any part is damaged or the device malfunctions.
For wet boots, you can start a set cycle earlier in the evening. Then check the insole and the toe. If the shoe is still damp, follow the instructions for the next cycle and only use the device when you can check its operation. This way, you dry in a targeted manner and use the device consciously.
Are electric shoe dryers safe to leave on overnight?
A shoe dryer does not need to run all night to do its job. A timer of 1 to 4 hours prevents the appliance from staying on unnecessarily long. The correct duration depends on the setting selected and the shoes. Always follow your dryer's instruction manual.
Check the appliance, the power outlet, and the shoes before use. Do not use the dryer if the cable, plug, or housing is damaged. Place it on a stable, dry spot and keep the air vents clear. Position the shoes so that they do not block the air outlet. This allows the appliance to function as intended.
A timer is no reason to turn on the dryer without preparation. Set the time according to the manual and select the appropriate setting. A short 1-hour cycle may be suitable for slightly damp shoes. Wet work shoes may require longer, but only extend the operating time according to the appliance's instructions.
- Before switching on: inspect cable, plug, and housing.
- When installing: keep the air inlet and air outlet clear.
- For the setup: use the timer and follow the manual.
- Afterwards: switch off and check the shoes for moisture.
Also pay attention to the space around the dryer. Do not place it under clothing, in a full closet, or next to objects that could cover the vent. Do not place socks or towels over the appliance. An open position prevents the airflow from being obstructed during the cycle.
If you want to dry the shoes before going to bed, start earlier in the evening. Afterwards, check if the insoles and toes feel dry. If there is still moisture inside, start a new cycle later when you are awake. Do not let the device run longer than permitted by the user manual.
With high work boots, the air supply may exit differently than with low shoes. Before starting, check that both shoes are properly positioned. A shaft pressing against the air outlet can obstruct the airflow. Follow the instructions for fitting boots and other closed shoes.
The practical rule of thumb: use a timer, keep the vents clear, and follow your model's instructions. A timer of 1 to 4 hours limits the set drying time but does not replace checking the cable, placement, or user manual. Turn off the dryer if you have any doubts about a damaged part or abnormal operation.
BEHA: Smart convectors steel front
BEHA offers smart convectors with steel fronts for those seeking electric heating in addition to drying work shoes. A convector heats the room but does not replace a shoe dryer and does not dry shoes directly. This way, you choose the right solution for every need.
Does a different look suit your interior better? BEHA also offers smart convectors with a glass front, a paintable front, and Classic convectors. Compare the versions with the room you want to heat and the look that matches it.
Would you like to know more about BEHAconvectors? View the options at beha.
Choose what fits your daily routine
Make maintenance and drying part of your work routine by caring for your shoes in a designated spot after use; with a functional shoe brush from De Borstelfabriek , for example, you can wipe off the initial dirt right at the foot of your shoes. An electric shoe dryer for work shoes can complement this if you regularly come home with damp shoes. Choose a solution that suits your shoes and the space where you want to dry them.
Are you also looking for electric heating for a room? BEHA offers smart convectors with a steel front, a glass front, and a paintable front. These are intended for room heating, not for drying shoes. Therefore, first consider what you want to tackle at home: wet footwear, heating a room, or both.
Do you want to discover which solution suits your situation? Contact BEHA and discuss what you are looking for. This way, you can move forward with a clear next step, at your own pace.
Frequently Asked Questions
Does a shoe dryer remove the sweat smell from my shoes?
A shoe dryer removes moisture but does not clean shoes. Sweat odor can linger in insoles, lining, and dirt. Remove removable insoles and clean them according to the washing instructions. Then let the shoes dry completely and rotate them so they can air out in between. If the odor persists, also clean the inside with a product suitable for the shoe material.
What is the best way to dry your shoes?
Remove mud and loose insoles. Gently dab away visible water and loosen the laces to create space for the tongue. Next, choose a method that suits the material: a dryer for closed, damp shoes or air drying for shoes that do not retain much moisture. Check the inside before storing them. Damp shoes can develop a musty smell in a closed closet.
How hot does a shoe dryer need to get?
For shoes, approximately 40 to 55 °C is usually sufficient. The set heat is not the only factor to consider: the material and the distance to the air outlet also matter. Follow the dryer's instructions for use and the shoe manufacturer's care advice. For leather or glued parts, a lower, appropriate setting is wiser than using extra heat. If a shoe feels hot, stop and let it cool down.
How does a shoe dryer work?
An electric shoe dryer directs heat, air, or both into the inside of shoes. The air helps to remove moisture from the lining and other closed parts. Place the shoes on or over the dryer according to the manual and do not cover the openings. For models with air tubes, direct the air supply into the shoe. Operation varies by device, so consult the operating instructions.
Which shoes is a shoe dryer suitable for?
A shoe dryer is primarily intended for closed shoes in which moisture has difficulty escaping, such as work shoes, boots, hiking shoes, and athletic shoes. Check for each pair whether the material and construction are suitable for the chosen drying method. Extra attention to the instructions for use is required for shoes with a waterproof membrane, leather upper, or glued parts. Open shoes generally require less airflow to the inside.
Who is this device suitable for?
A shoe dryer is handy if you regularly wear damp closed shoes, for example due to outdoor work, walking, or sports. In a household with multiple people who wear boots or athletic shoes, a dryer can also be part of the care routine. Choose the setup based on the types of shoes you want to dry most often.
Where can you buy a shoe dryer?
You can view and purchase BEHA shoe dryers through the dealer network. BEHA sells shoe and textile dryers. Use the dealer locator on the website to find a point of sale. Determine in advance whether you primarily want to dry low shoes, high boots, or different types of shoes. This way, you can focus specifically on the placement and controls that suit your needs.
Which electric shoe dryer is suitable for work shoes?
Choose an electric work shoe dryer that matches the height and interior space of your shoes. For tall boots, the air intake must reach the shaft; for low work shoes, the opening is easier to access. Also check which materials and drying settings are suitable and follow the installation instructions. Remove removable insoles if possible. This allows the space under the sole to dry as well, enabling you to better assess the result.